Just bought a Dell Inspiron 1121 (11z / M101z) and want to know how to upgrade the memory or hard drive? Unlike a few netbooks from the Dell Mini line, it’s quite simple on the 1121 and all you need are a couple of screw drivers and about 10 minutes – keep on reading to learn how!
Video Guide:
Text Guide
First off, Dell has an illustrated guide on how to access the memory and hard drive here: http://support.dell.com/support/edocs/systems/ins1121/sm/index.htm. I’d suggest using that to supplement my guide (it’s what I used!) if you have any questions.
Upgrading the memory:
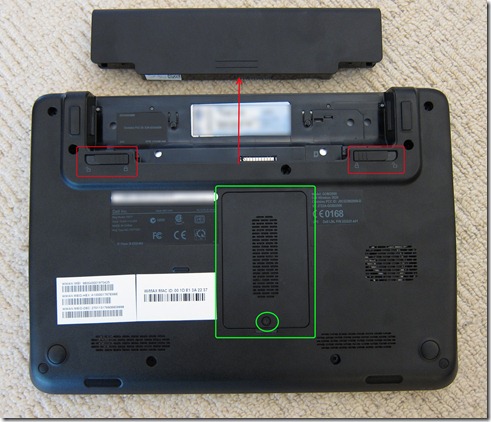
1. Remove the battery, unscrew the memory door screw, and remove the memory door itself:
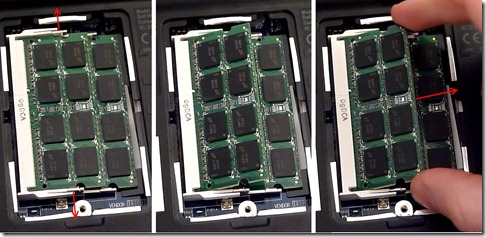
2. Push the clips on either side of each of the memory sticks and the memory stick should pop up a bit. Then simply pull/wiggle them out.
To put the memory back in, simply push them back into place (you know it’s all the way in when you cannot, or barely, see the gold contacts of the memory stick), and push it down into the clips. Screw back on the memory door and you’re done upgrading the memory!
Upgrading the hard drive:
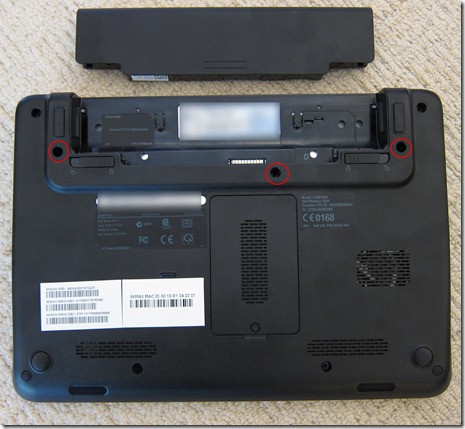
1) To gain access to the hard drive, you must first remove the keyboard. To do this, start by removing these three screws on the bottom:
2) Now we need to start pulling the keyboard out. The easiest way to start this is by using a screw driver (or any other small tipped object), and push the keyboard out through one of the screw holes you just worked with and grab it from the other side when it’s pushed out a bit: 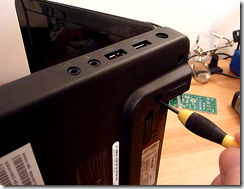
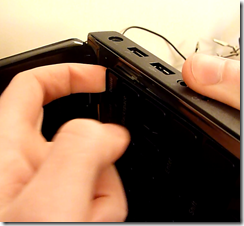
3) With your finger holding a corner of the keyboard out, proceed by sliding your finger to the other side and getting the other corner loose. 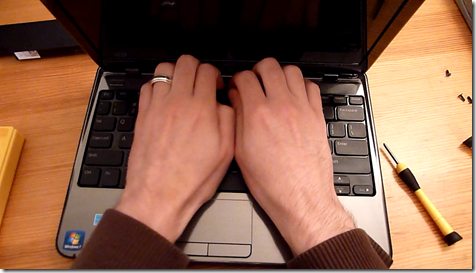
It’s important to note that there are 4 clips holding the keyboard in at this point (and 5 tabs at the bottom): 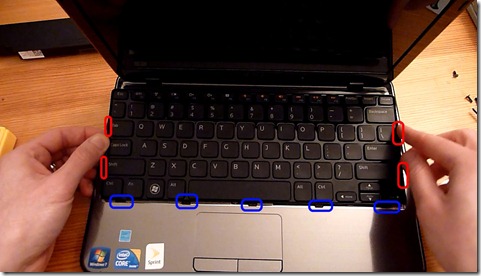
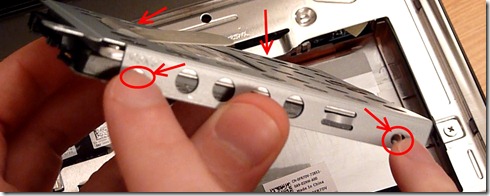
You can probably just pull up on the keyboard to get the two top tabs (red) loose, but you may need to use a credit card to put in between the keyboard and the chassis to get the bottom two clips loose: 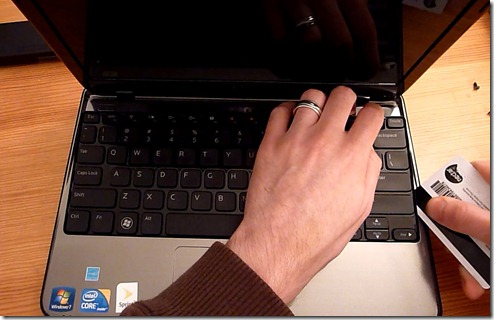
4) With all 4 clips overcome, slide the keyboard up towards the screen a bit (to clear the bottom 5 tabs) and flip the keyboard over the palm rest. Note, don’t pull the keyboard too far away from the computer as it is still attached via a ribbon cable: 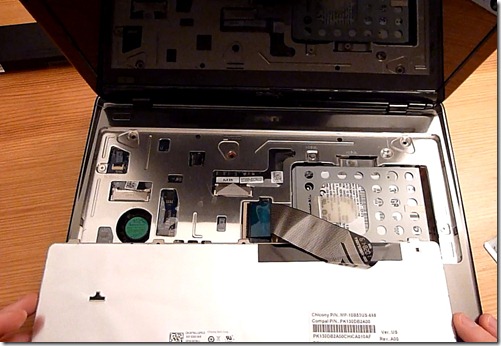
5) At this point, you could remove the hard drive as is, but I think it’s better to remove the keyboard entirely (just so you have less chance of pulling the keyboard out and damaging the cable). All you need to do is flip up the tab holding the cable to the motherboard (the black part of the tab is hinged to the white part, so with minimal force, just pull it (rotate it) up and to the left – watch the video if you are unsure – and the cable will be free): 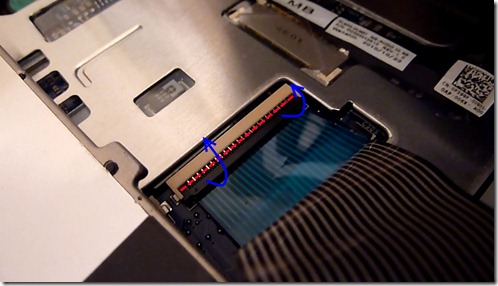
6) With the keyboard completely removed, all you need to do is remove the two screws securing the hard drive in place and pull it to the right, then out: 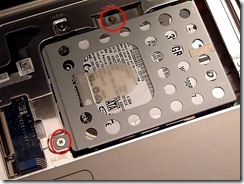
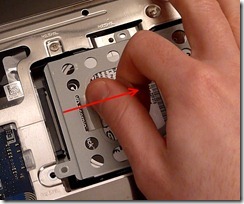
7) From here, just simply remove the 2 screws on either side securing the drive to the drive caddy, replace it with your new hard drive, and screw it back in:
8) Place the hard drive and caddy back in it’s place, slide to the left, put back in the two hard drive screws. Then, place the keyboard upside down on the palm wrest, flip the ribbon cable upside down so you see the white line,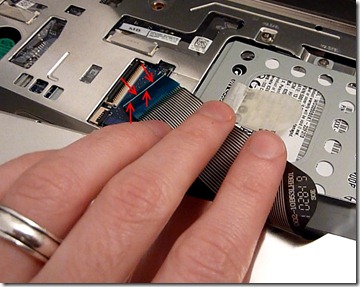
place the ribbon back in the connector, and rotate the latch closed: 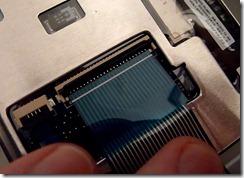
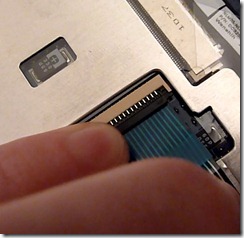
9) Almost done – flip the keyboard around and start with making sure the tabs slide under the chassis, press on the keyboard around where the 4 clips are, replace the 3 screws underneath, and you’re done! 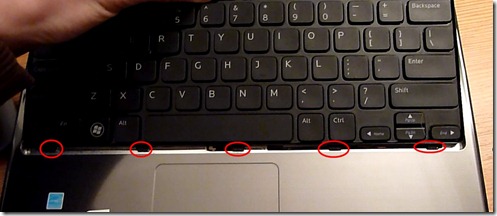
And there you have it – relatively quick and painless to upgrade the memory and hard drive. If you’re looking for some memory upgrades, here are a few options:
Any thoughts to make this easier or want to know how to dismantle or upgrade any other part of this laptop? Let me know in the comments!

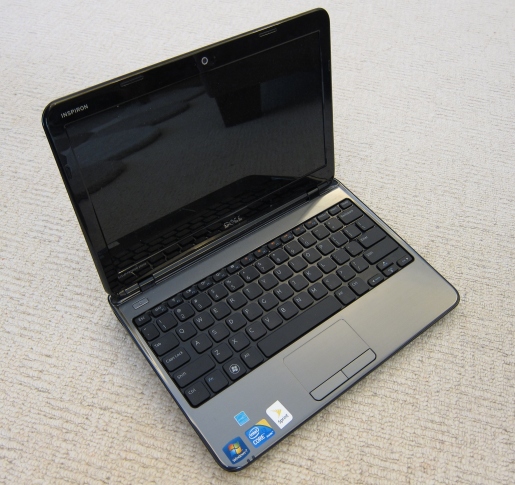
I want to thank you for making this guide and video. With my HP laptop display dying on me, I was looking for another replacement and Sprint is offering this one. Searched high and low for info and came across this guide. Not only does it answer my question on how to upgrade the memory and hard drive but it gives me a much better view of the laptop from all angles.
Now just have to see what hard drive replacement, any recommendations?
Again, thanks for a very good guide and video.
Hi twospirits, any 2.5″ hard drive will do, your budget is really what the deciding factor is — I’m currently using a Western Digital Scorpio Black 320GB 7200RPM HDD, but I also just bought a Crucial M4 128GB CT128M4SSD2 SSD yesterday to get a bit more speed and battery life (I’ll let you know how well it performs once it arrives if you’re curious).
I’ve ordered this laptop from Dell, but it may not be the ‘sprint’ model (model M101z). Mine is supposed to be the 1121/ 11z, and that’s it. Do you know if there’s a big difference? If so, what? I haven’t received it yet, so I may be jumping ahead too soon, but want to ask the following:
For upgrading the memory, I recall seeing somewhere that one needs to remove the 2gb ram stick that comes in the laptop, then insert the new 4gb ram stick into that slot. Finally, one moves the 2gb stick that one has just taken out and puts it into the other closer slot. They seem to be cascaded, with the ‘closer’ slot laying over the top of the other. Does it matter? Is this an important order of steps to take?
@Doug, consider it the same laptop. There are two memory slots, so if yours comes with one stick, you can simply place in a 4gb stick into the other slot (though it doesn’t matter which stick is in which slot, ie, if you have a 2gb and a 4gb stick, either can go in either slot).
James, i forgot to thank you for the follow up to my question.
Thanks again.
Do you know where the wwan card slot is? i have a sprint 11z and I want to swap out the wimax card. i don’t see it in your pictures under the keyboard and there is only one compartment on the bottom for the memory. can i get to it without ripping apart the entire computer?
@P, unfortunately, you indeed need to dismantle the laptop further as the card is located under the palm rest (http://support.dell.com/support/edocs/systems/ins1121/sm/minicard.htm#wp1180236). However, it’s not *too* much more work once you have the keyboard removed as it’s just 7 more screws, 2 more ribbon cables, and then prying off the palm rest.
This is a great guide-thank you! I am on my second foray into the guts of this computer, the first being a HDD replace which was very smooth.
Unfortunately, the AC adaptor was hit while plugged in and broke the screw socket in the fram, which is (based on the fact that it no longer charges) part of the grounding circuit.
Any suggestions on repairing that? Perhaps a conductive epoxy build-up and stuffing the female screw insert into it until it sets up? Or do I just need to tell the owner it’s a loass?
Ah, that’s a good question, but unfortunately I don’t have a good answer for you. While not being any sort of electrical engineer, what you propose sounds like a plausible fix, and I couldn’t think of any other way to do the repair. I know that’s not much of an answer, haha, though let me know how it goes as I’d be curious to know if that works!
James, many thanks to you for posting these very detailed, helpful directions. I just followed them step by step to install, easily and successfully, an SSD in my Inspiron 11z. Couldn’t have done it without you. Hats off!
hi, is it possible to upgrade the Ethernet to gigabit. I am using the 11z as a DVR with a hdhomerun prime and cable card on my network. Adding 10/100/1000 would increase quality. Awesome instructions and video!