Upgrade a Dell XPS 13 9370 SSD
Check out the new tutorial on how to upgrade the SSD on the Dell XPS 13 9370 on my new site over at https://jameshasanswers.com/how-to/dell-xps-13-9370-ssd-upgrade/
Upgrade a Dell XPS 13 9370 SSD Read More »
Check out the new tutorial on how to upgrade the SSD on the Dell XPS 13 9370 on my new site over at https://jameshasanswers.com/how-to/dell-xps-13-9370-ssd-upgrade/
Upgrade a Dell XPS 13 9370 SSD Read More »
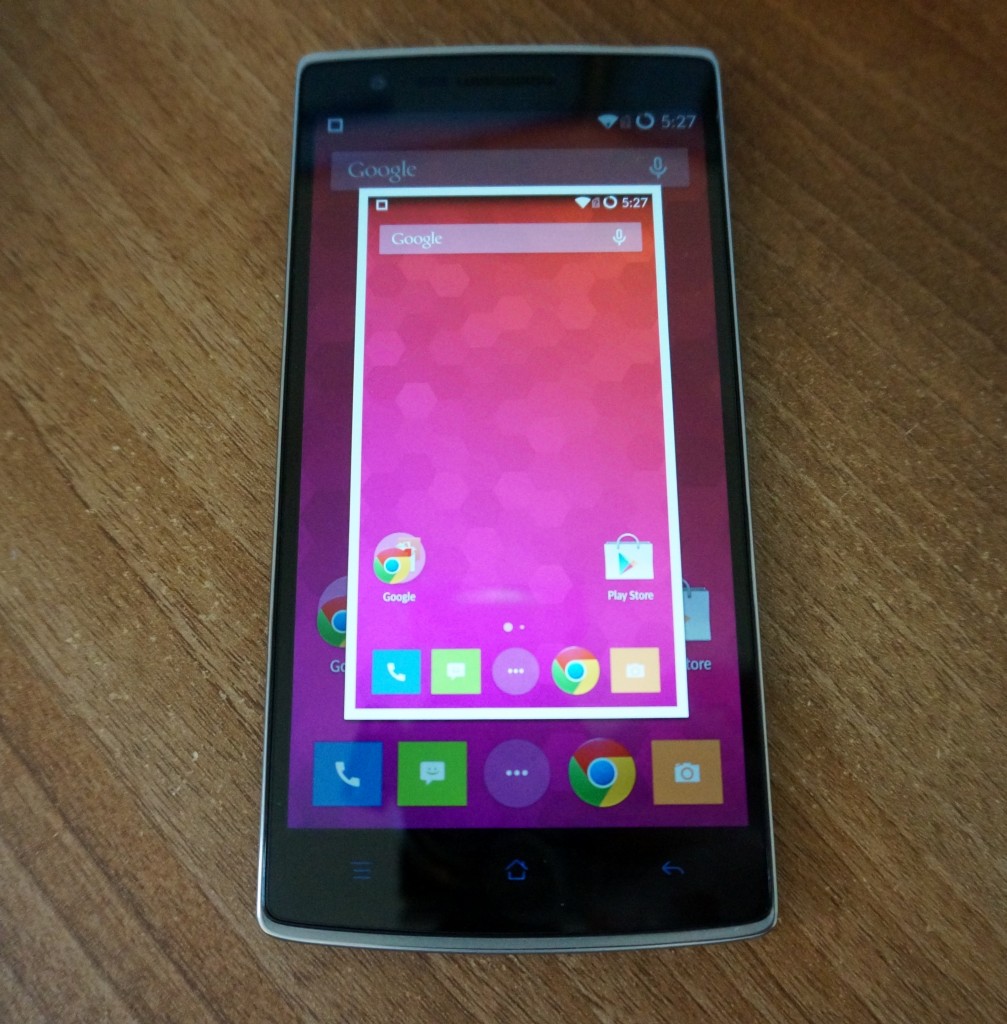
Learn two ways to take a screenshot on the OnePlus One!
How to take a screenshot on the OnePlus One Read More »
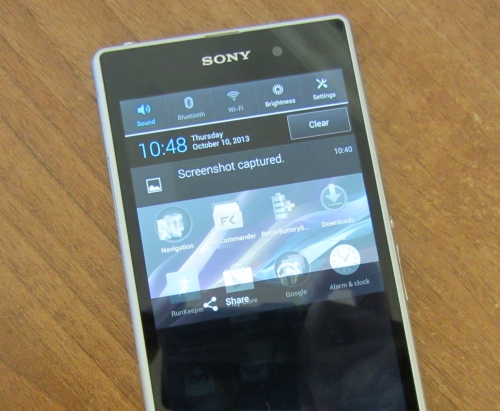
Learn how to take a screenshot on the Sony Xperia Z1
How to take a screenshot on the Sony Xperia Z1 Read More »
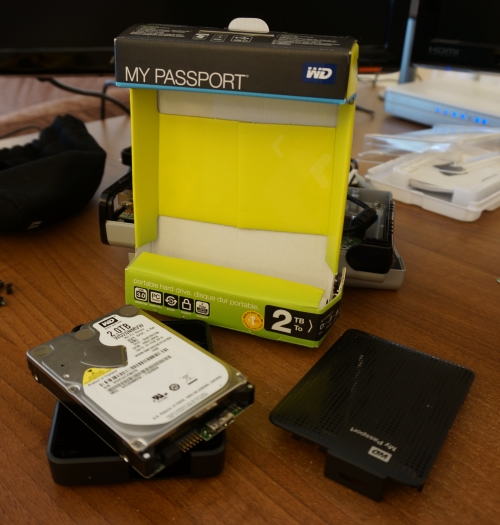
Learn how to extract the drive from a Western Digital My Passport USB 3.0 portable hard drive
How to dismantle a Western Digital My Passport external hard drive Read More »
This is a pretty straight forward post – how to take a screenshot with the Samsung Galaxy S3. There are two out of the box ways to do it, and for both, the screenshots are saved to the /mnt/sdcard/Pictures/Screenshots directory and also copied to the clipboard. Screenshots on the Galaxy S3 1) Power
How to take a screenshot with the Samsung Galaxy S3 Read More »
In an effort to go completely paperless, I was presented with the problem of needing to sign a document that was emailed to me and send it back. Without having to print out the form to sign it nor needing access to a scanner or fax machine to send it back, you can simply take
How to easily sign PDFs for free Read More »
Just bought a Dell Inspiron 1121 (11z / M101z) and want to know how to upgrade the memory or hard drive? Unlike a few netbooks from the Dell Mini line, it’s quite simple on the 1121 and all you need are a couple of screw drivers and about 10 minutes – keep on reading to
How to upgrade a Dell Inspiron 1121 (11z) Read More »
I recently bought two Foxconn nT-330i machines (dual core, atom n330, mini desktops) and found myself needing to flash the bios. However, I installed Windows 7 64bit and Linux on them and unfortunately there’s no easy utility to flash the bios from within either of those operating systems (the Foxconn bios utility only works in
How to flash the bios on a Foxconn nT-330i Read More »
Enable voice calling from your AT&T Samsung Galaxy Tab by downloading a few files and making a few clicks.
How to enable voice calling on AT&T Galaxy Tab Read More »
Learn how to take screenshots / screen grabs on the Eee Pad Transformer (without any additional software or apps)
How to take a screenshot on the Eee Pad Transformer Read More »